
Integrating LiveHelpNow into Google Tag Manager
How do I install LiveHelpNow widget code in Google Tag Manager
Google Tag Manager (GTM) is a simple solution for managing JavaScript snippets that send data to third parties (like LiveHelpNow) from your website or app. You can easily add or remove snippets without requiring a developer to update any code.
GTM is highly recommended for LiveHelpNow widget installation. It is easy, fast and the simplest way to load the LiveHelpNow on your website.
Important:
- You must have Google Tag Manager installed on your website.
- You'll need permissions to edit your website's Google Tag Manager configuration. — If you're unsure who owns your Google Tag Manager account, check with the team or person who manages your website, SEO or Marketing operations.
Installation
- Please first copy LiveHelpNow widget code from Admin Panel > System setup > Website code
- Sign in to google tag manager and select your website's container
- From the 'Tags' section of your GTM account, click 'New' to create a new tag:

- Name the new tag "LiveHelpNow" and select Custom HTML for tag Type
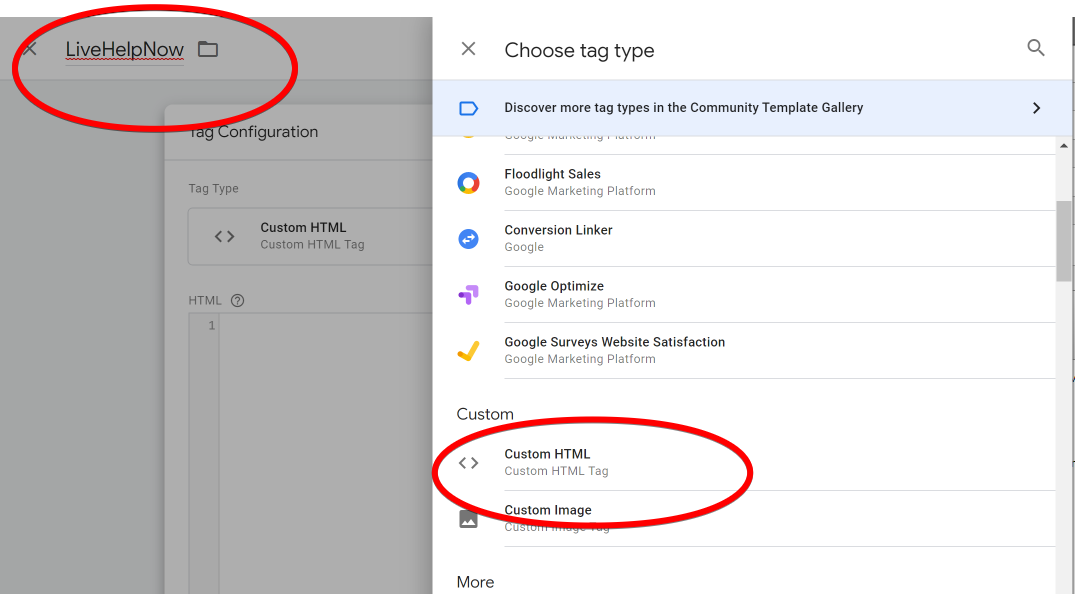
- Paste coped in step 1 LiveHelpNow code into the HTML portion and open the 'Triggering' section, and choose the trigger for loading the LiveHelpNow widget.
You can choose an existing trigger, or create a new one with the '+' icon in the top right: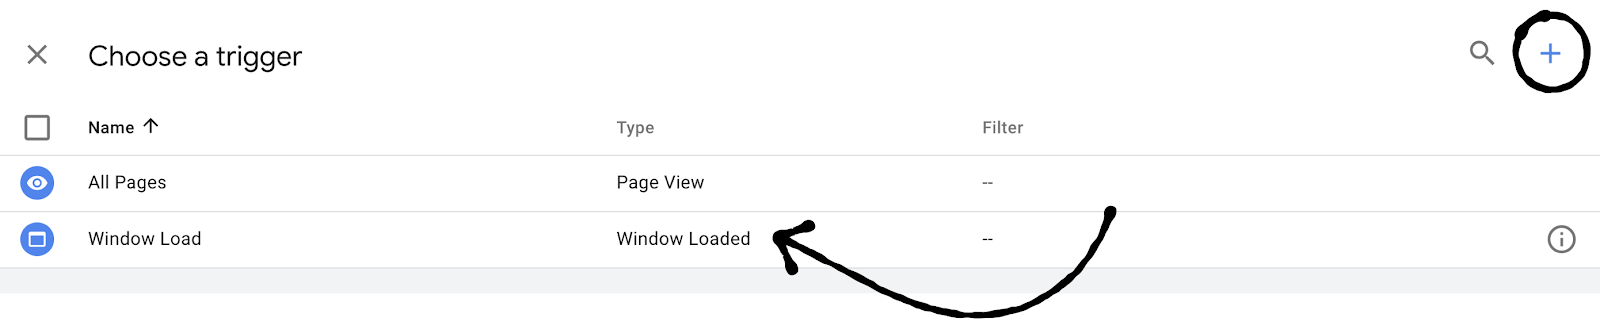
Tip: For optimal user experience we recommend choosing “Window Loaded”, so your website loads as fast as possible: - Your tag is now configured!
All that is left to do is to “Submit” the changes to your container for them to take effect.
Tracking events
Before you begin
In order to complete this guide, it is assumed that the following has already been done:
- Created a Google Analytics 4 account and property
- Created a web data stream for your website
- Placed the Tag Manager snippets on your website
- Created a Google Analytics 4 Configuration tag
It also assumes that you have the following:
- Access to the Tag Manager container for the website
- The Editor (or above) role to the Google Analytics account
Set up events
To set up an event using Google Tag Manager, you will configure a Google Analytics: GA4 Event tag and then create a trigger that specifies when you want to send the event.
The following steps show you how to send a custom event to a Google Analytics 4 property when a user commences live chat. The steps show you how to implement the event using Tag Manager.
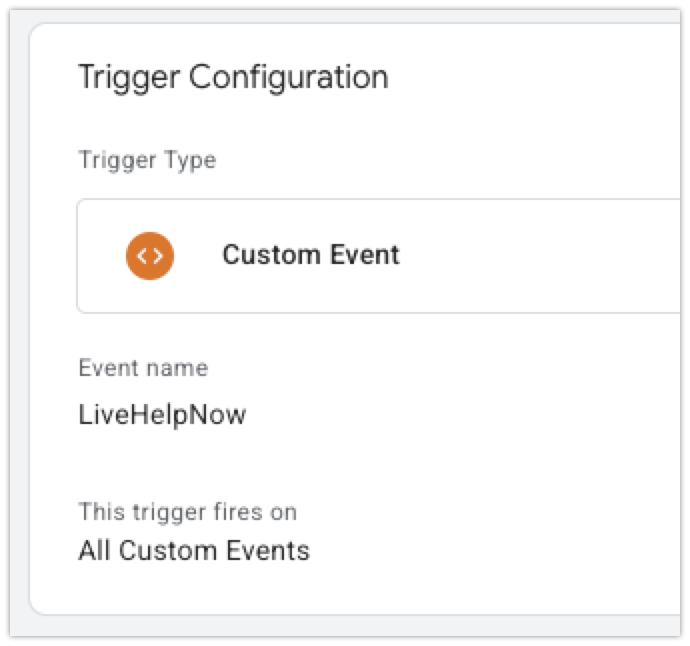
Step 1: Create a Custom Event Trigger
- In Google Tag Manager, go to Triggers and click New
- Choose Custom Event as the trigger type
- Set the Event name to:
LiveHelpNow - Leave the trigger fires on "All Custom Events" (or add conditions if needed)
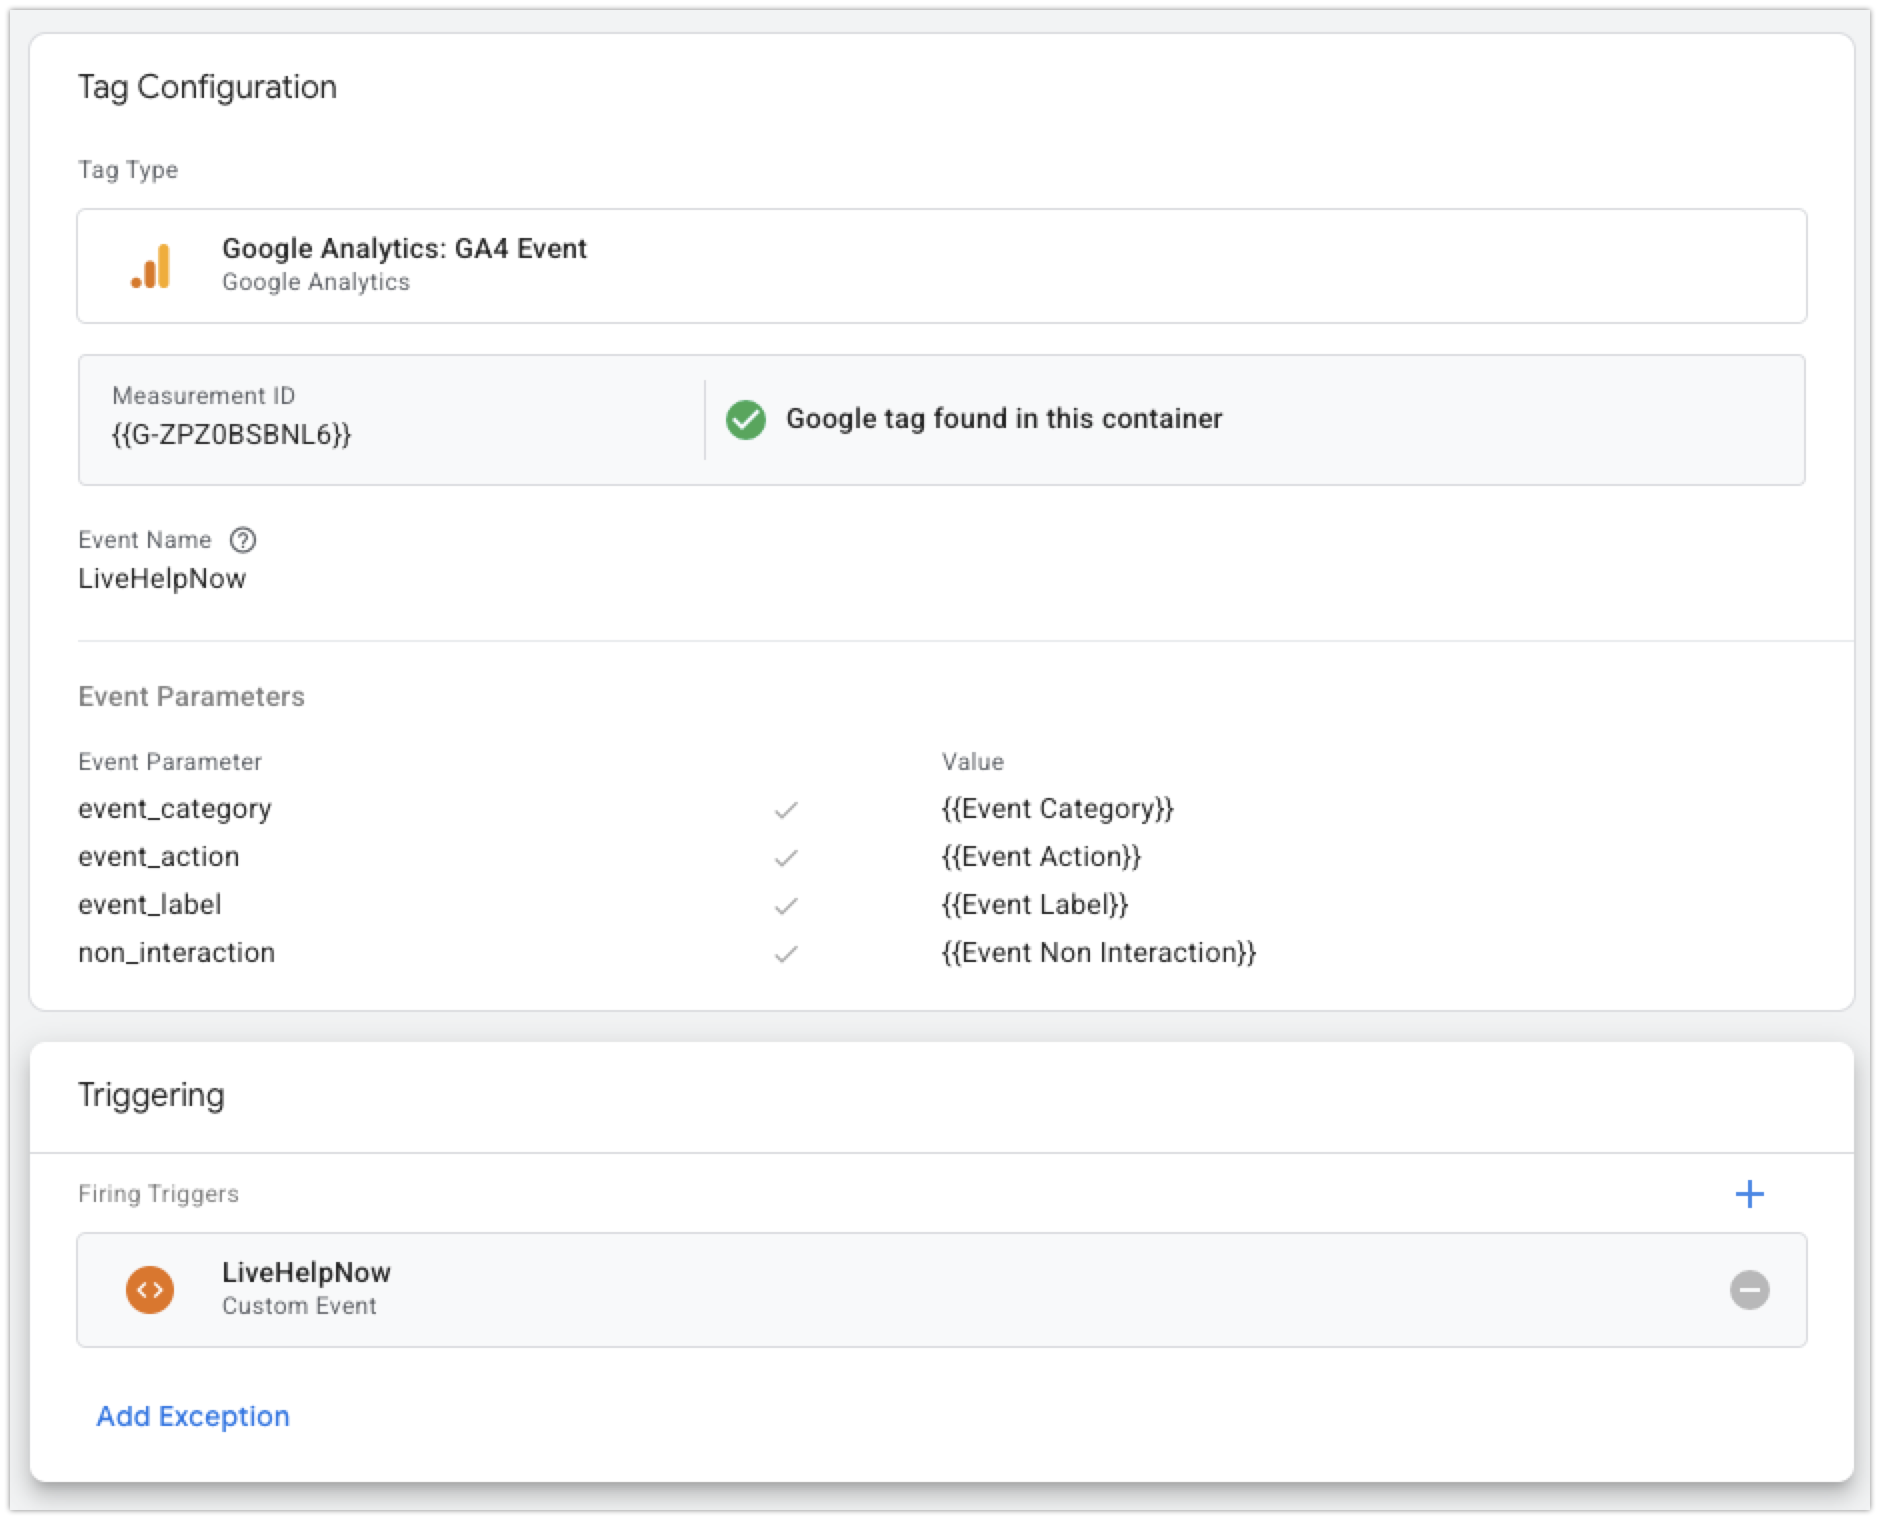
Step 2: Create a GA4 Event Tag
- Go to Tags and click New
- Choose Google Analytics: GA4 Event as the tag type
- Configure the tag:
- Configuration Tag: Select your GA4 Configuration tag
- Event Name:
LiveHelpNow(or your preferred event name) - Event Parameters: Add these parameters:
event_category:{{Event Category}}event_action:{{Event Action}}event_label:{{Event Label}}non_interaction:{{Event Non Interaction}}
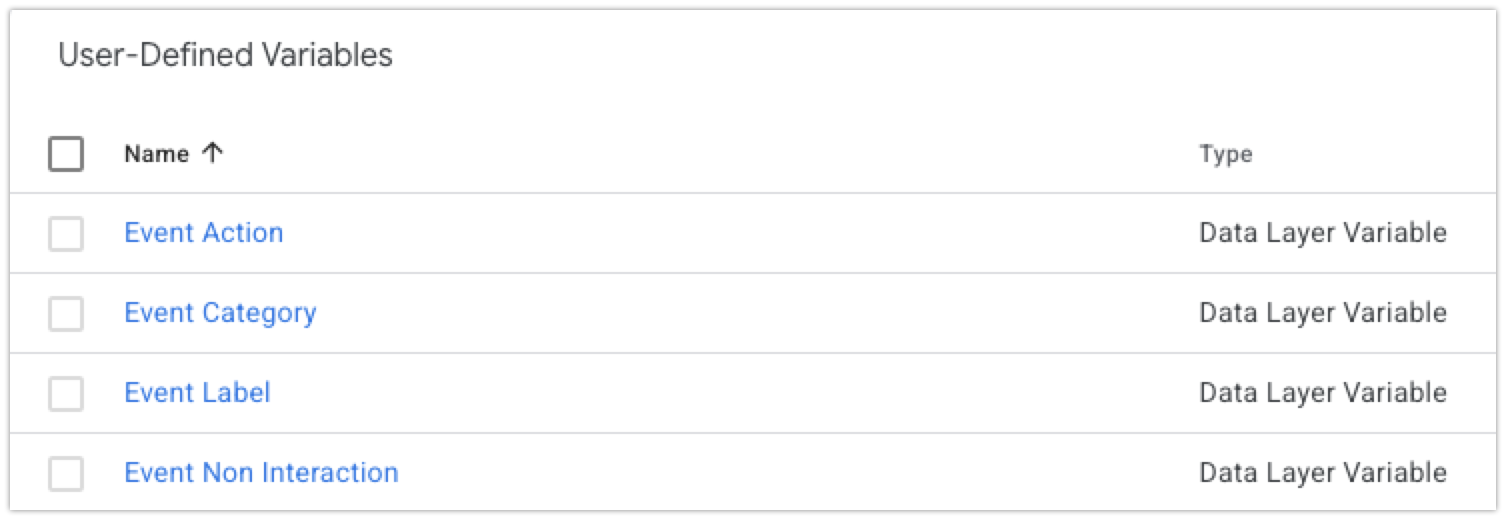
Step 3: Create User-Defined Variables
Go to Variables → User-Defined Variables and create these:
- Event Category
- Variable Type: Data Layer Variable
- Data Layer Variable Name:
eventCategory
- Event Action
- Variable Type: Data Layer Variable
- Data Layer Variable Name:
eventAction
- Event Label
- Variable Type: Data Layer Variable
- Data Layer Variable Name:
eventLabel
- Event Non Interaction
- Variable Type: Data Layer Variable
- Data Layer Variable Name:
eventNonInteraction
Step 4: Set the Trigger
Attach the custom event trigger you created in Step 1 to your GA4 event tag.
Step 5: Test and Publish
- Use GTM's Preview mode to test the setup
- Trigger your LiveHelpNow widget to fire the event
- Verify the event appears in GA4's DebugView (if you have debug mode enabled)
- Publish your changes when everything works correctly
You can use preview mode to test changes to your container before you publish those changes to your website. Learn more about preview mode
See your events in Analytics
You can see your events and their parameters using the Realtime and DebugView reports. Note that the DebugView report requires some additional configuration before you can use the report. These two reports show you the events users trigger on your website as the events are triggered.
Additional customization for advanced users out there.
Note: These examples may require creating custom tags in Google Tag Manager, if you’re not already tracking the events needed to trigger the method.
Show message or start chat when a visitor shows signs of leaving your website
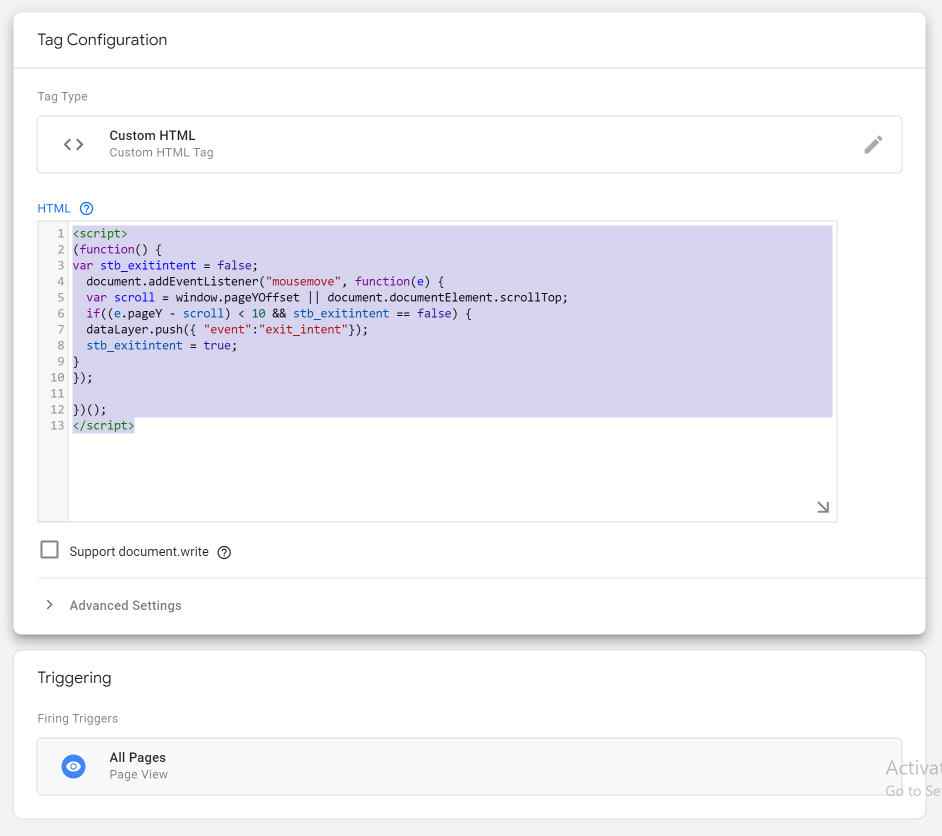
Create "Exit intent" tag by using the following JavaScript in custom html tag type:
<script>
(function(){
varstb_exitintent=false;
document.addEventListener("mousemove",function(e){
varscroll=window.pageYOffset||document.documentElement.scrollTop;
if((e.pageY-scroll)<10&&stb_exitintent==false){
dataLayer.push({"event":"exit_intent"});
stb_exitintent=true;
}
});
})();
</script>
Like so:
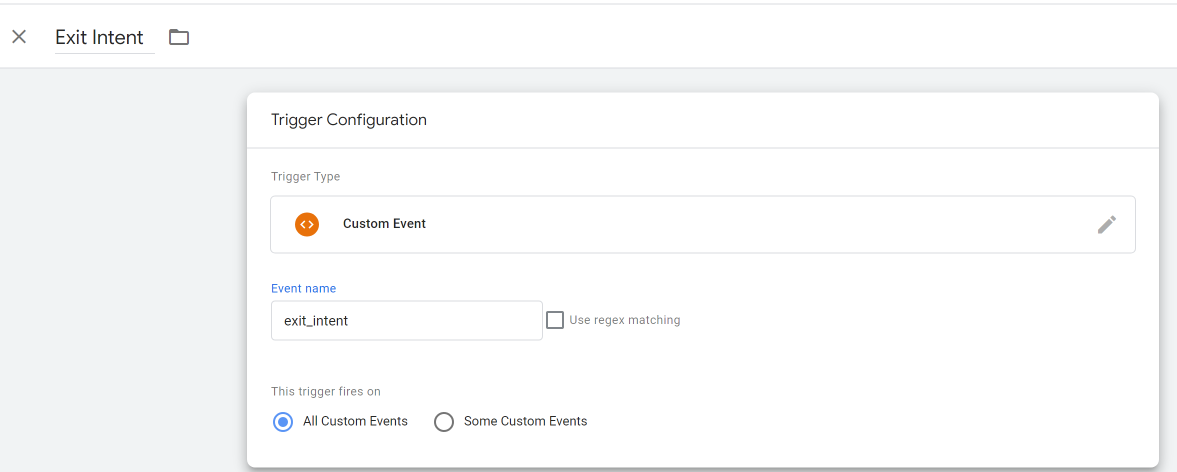
Setup a new trigger for exit intent:
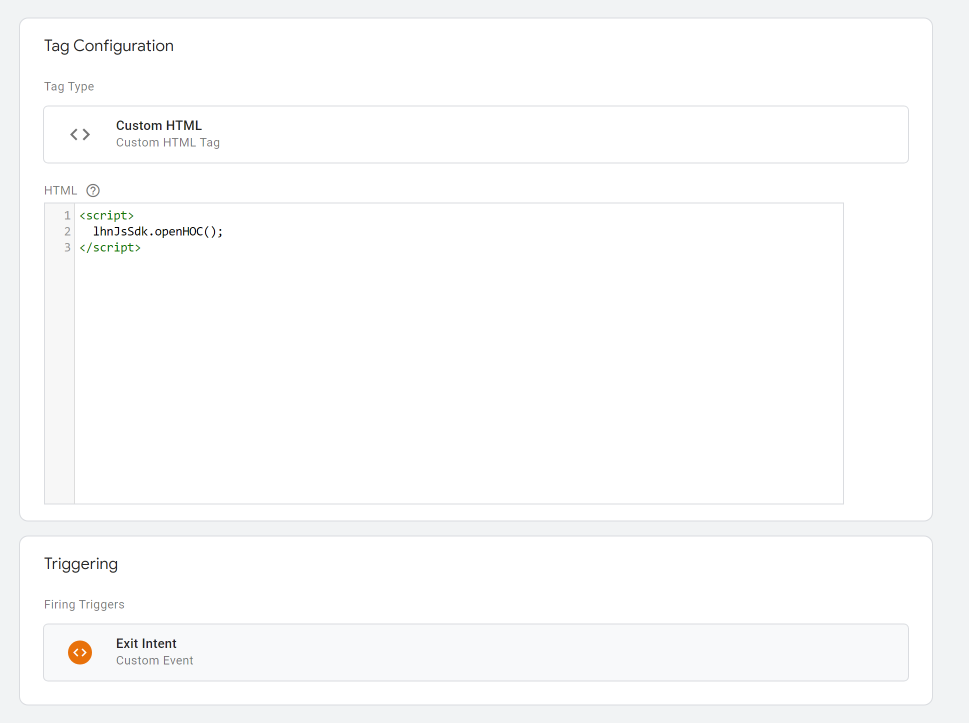
Then add a new tag to launch chat window or send invitation messages, etc. by following LiveHelpNow JS Sdk docs
Getting support with Google Tag Manager
If you have trouble identifying or tracking logged in users, tracking custom events, or triggering Intercom methods with custom tags that rely on GTM's data layers we recommend getting support from Google directly.