
Agent workspace: Ticket Workflow
How can support agents efficiently handle and resolve support tickets
Intro to Support Ticket in the Agent Workspace 2.0
When it comes to customer service communications, support tickets and live chat are two popular options While both serve the purpose of addressing customer queries and issues, they differ in terms of their effectiveness depending on the specific situation.
Support tickets are highly effective in facilitating customer service communications that do not require immediate resolutions. These tickets allow customers to submit their queries or issues through an online form or email. The advantage of support tickets lies in their asynchronous nature, as they do not require real-time interaction between the customer and the support team.
Support tickets offer several benefits for both customers and support staff. Firstly, customers can provide in-depth and detailed information about their queries or issues while having the flexibility to articulate their problems at their own pace. This allows customers to be more precise in describing their concerns, leading to clearer and more accurate communication between the customer and the support team.
Additionally, support tickets provide an audit trail of customer interactions, which helps the support team keep track of customer issues and ensures that nothing falls through the cracks. This audit trail serves as a reference point for both the customer and the support team, enabling efficient follow-up and resolution of the issues raised.
Support Ticket sources
Support tickets may be created via the following sources:
- Email. Your LiveHelpNow account is allocated a support email where customers can send the inquiries to. You may find it in Admin Workspace → Support Channels → Email. It is a great idea to server forward all incoming emails to your company support email address to your @livehelpnow.net email address. So every email customers already send to you are converted into support tickets for your agents to accept and respond.
- Online form. You may setup your support ticket form in Admin Workspace → Ticket → Forms. Ticket form may be used within website widget found in Admin Workspace → System setup → Website code as well as embedded within your web page by using Embed command. You may also access Support Ticket form via link: https://kb.livehelpnow.net/YOUR_ACCOUNT_NUMBER/sp/ticket
- Agent initiated. Agent can create new tickets within the Agent Workspace by selecting "Add new" record icon

- API. Please review our API docs.
Support Ticket Handling in the Agent Workspace 2.0
Ticket statuses
Each support ticket is assigned a status.
- Open - New ticket which has not yet been worked on. Marked as red in the agent workspace.
- Closed - The Issue was resolved and ticket is now closed. Marked as gray in the agent workspace.
- Working - The Issue is being worked on. Marked as blue in the agent workspace.
- Waiting for feedback - An agent assigned to the ticket is waiting for customer's feedback. i.e. when clarification of the issue is requested. Marked as green in the agent workspace.
- Feedback received - When the customer provides requested information, ticket status is changed to Feedback received. Marked as yellow in the agent workspace.
- Comment Added - When an agent adds a comment to the ticket to provide additional details to the customer. Marked as blue in the agent workspace.

Having tickets marked with colors allow agents to quickly prioritize which ticket they should be working on first.
Ticket search and filters
To access filters please select funnel icon in the agent workspace

Select predefined "Just tickets" filter which will show all tickets except for "Closed" status tickets. Or select "Create New Filter" to create your own ticket view.
Numerous filter options are available
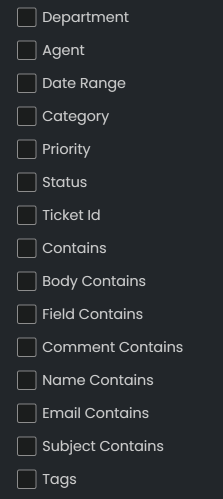
Once you configured the filter, you may name and save it. You may also pin it to be easily accessible.
 |  |
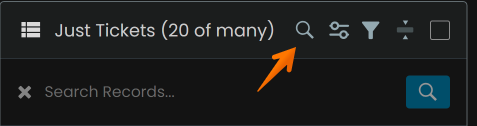
You may also search current ticket view/filter by engaging quick search. You may search by any ticket attribute, such as ticket #, name, email, body, etc.
Ticket workflow
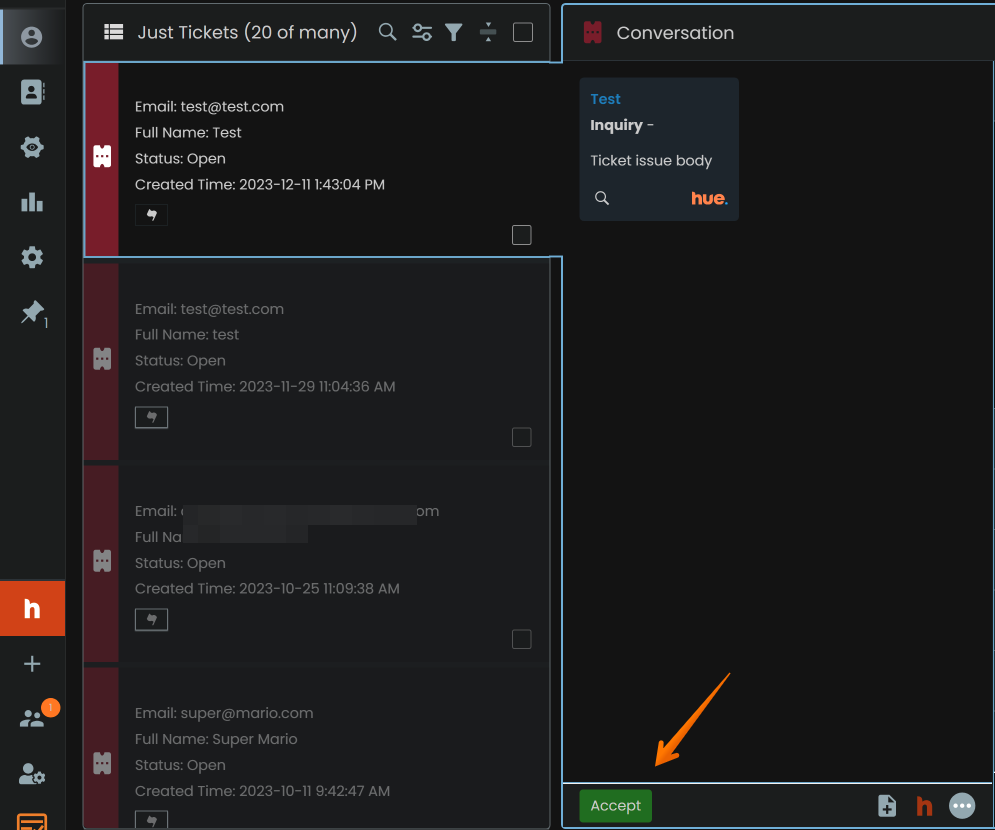
Unless you configured automatic ticket distributions for your agents via Ticket Automations new tickets will have a status of "Open" and will wait for your agents to accept it.
Select the ticket and click on "Accept" button to assign the ticket to yourself and begin working on the issue.
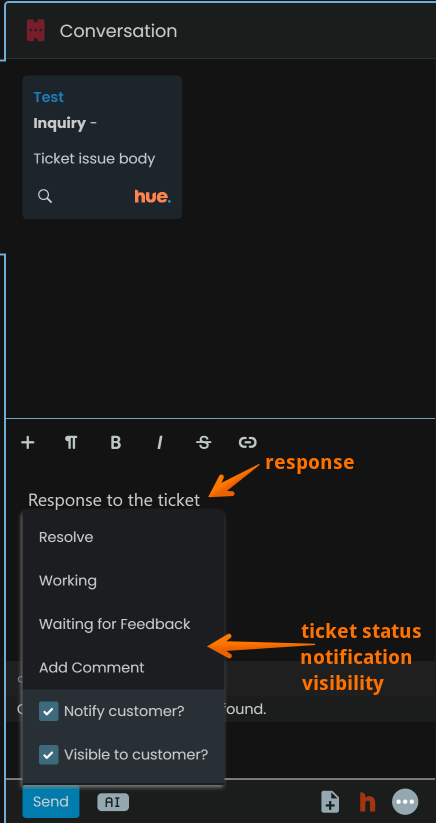
Type your response and click on "Send" button to add your comment, or resolve a ticket. Select the status to be assigned to the ticket and whether customer should be notified or the comment you are submitting or it should remain private.
Once the ticket is assigned to you, you will receive all updates pertaining to the ticket like new customer comments, status changes, etc.
Other tools
Selecting the "burger" menu will enable you to use other tools available for the ticket
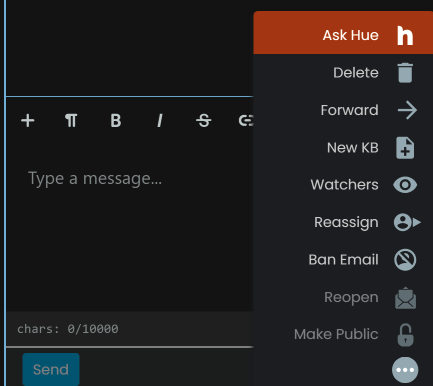
Ask Hue - ask Hue AI to provide an answer to the ticket. Learn more about Hue AI agent assist.
Delete - Delete the ticket. Permanent purge.
Forward - Forward a copy of the ticket to anyone within or outside your account.
New KB - create a knowledge base article based on the information within the ticket.
Watchers - Add/remove watchers to the ticket (BCC)
Reassign - Reassign a ticket to another agent/department.
Ban Email - 3 day ban of the customer email address. No new tickets will be allowed for the banned email address for 72 hours. If you require permanent ban, please contact support.
Additional Workspace Customization
As an agent, having a workspace that caters to your specific needs and preferences can greatly enhance your productivity and effectiveness With LiveHelpNow Agent Workspace 2.0, you can now easily customize almost every aspect of your agent workspace, allowing you to tailor it to your unique requirements. Let's explore the various ways you can personalize your agent workspace and create an environment that maximizes efficiency.
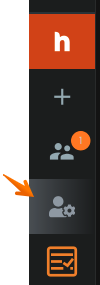
Select Agent Settings button to enter workspace customization screen.
Select "Panel Layouts" to switch between dark and light modes as well as configure your general layout.
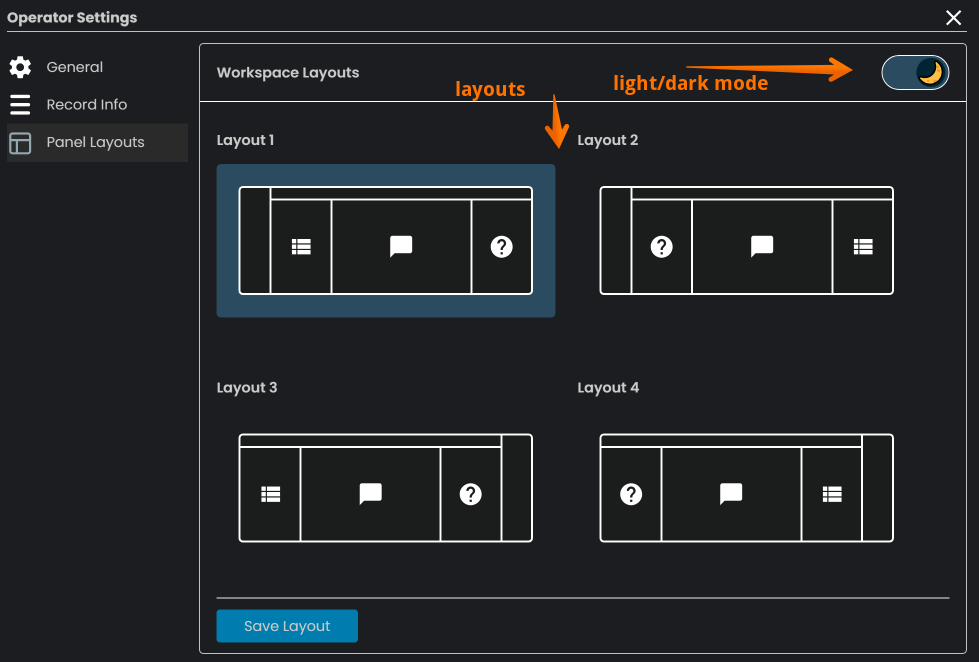
Scroll down to configure which sections to be shown/hidden within your layout. For example if customer device information is not important to you, remove the check mark next to it to hide it.

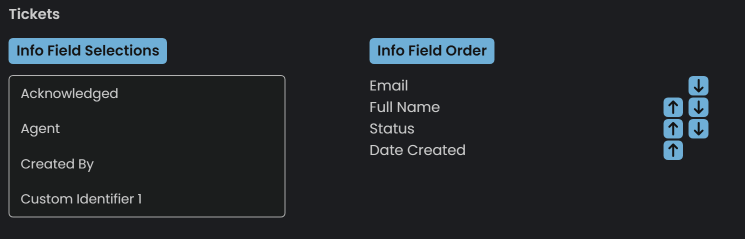
Select "Record Info" to customize which ticket attributes to be shown in the initial ticket record display and in which order.
As always if you have any further questions on the Ticket Workflow, please contact friendly LiveHelpNow support.