
Configure SSO in Google SAML
How do I configure SSO in Google SAML?
Configure Google SAML app
Here is our How-to guide for configuring SSO with your Google SAML account.
- Navigate to your organization's Google workspace admin https://admin.google.com/ac/apps
- Select Web And Mobile Apps
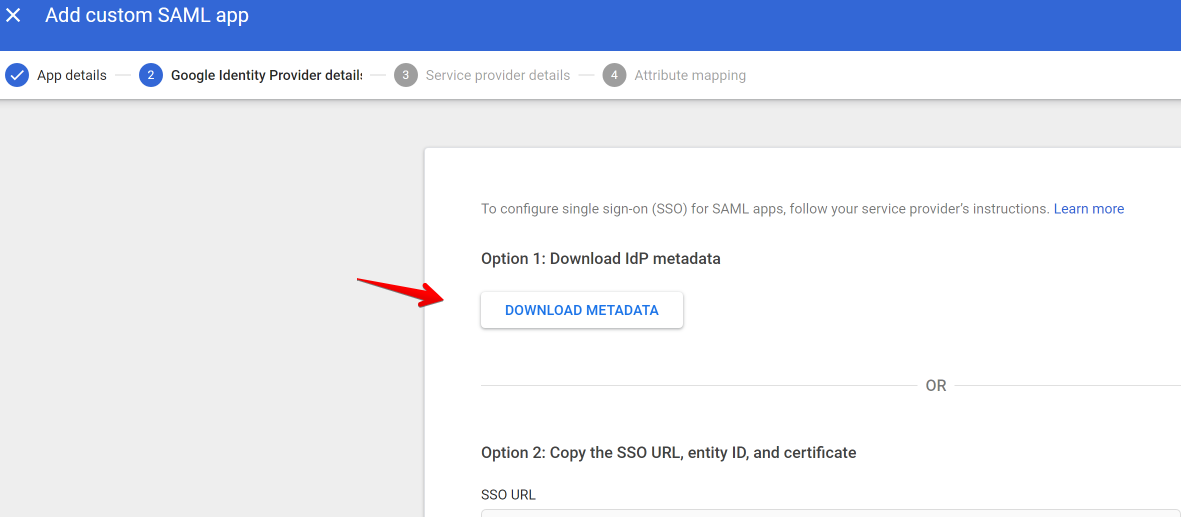
- Select Add App > Custom SAML app
- Name the App and select Continue
- Download Metadata file
- Go to LiveHelpNow Admin Panel > Security > Single Sign-On
- Add new app
- Provide Name, Domain, Select IDP Google and select scope
Then upload the metadata file downloaded in the step 5 in the 'Connection Data' section. After uploading this, our system will auto-populate the fields below.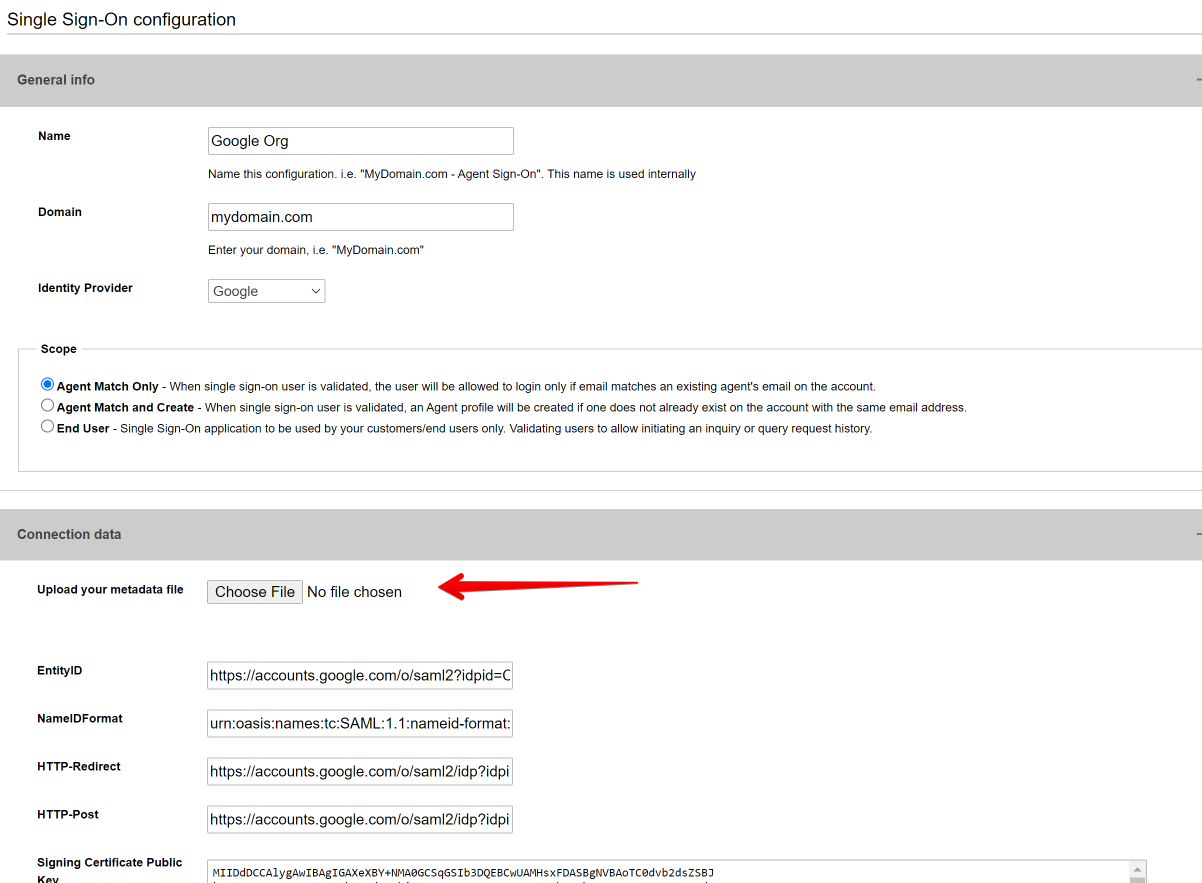
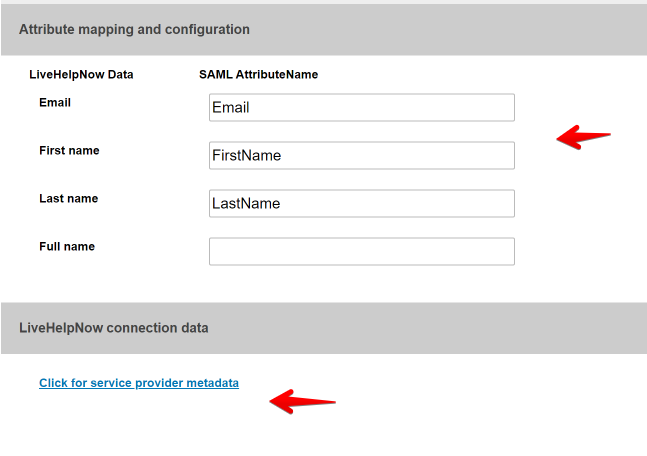
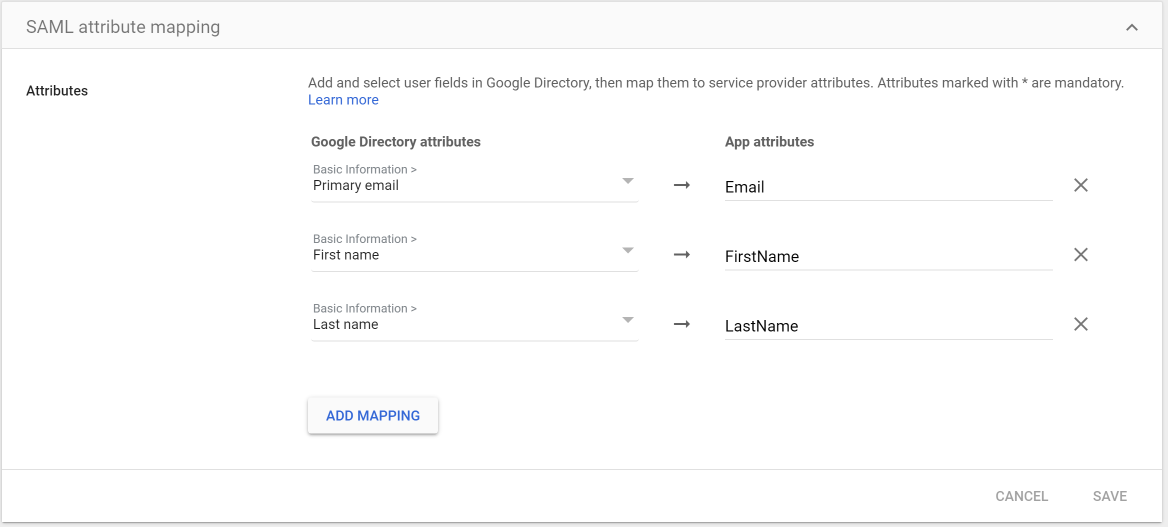
- Configure the field or Attribute mapping. Click the "Update Settings" button and download the app's metadata.
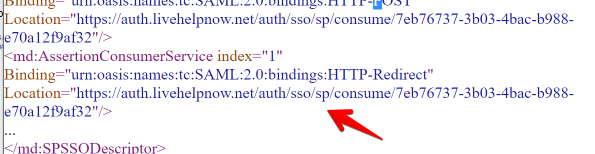
- Within Google SAML app settings enter https://auth.livehelpnow.net for Entity ID
- For ASC URL please enter the Location value of AssertionConsumerService key.
- Configure the field mapping and save your Google SAML app.
Here is our general guide on how to configure SSO
If you have any questions or need further assistance, please feel free to email us at [email protected] or start a chat with us, we're here to help.